| ID |
Task |
Duration |
Start Date |
End Date |
Comments |
| 0 |
Flat Skiff 14 |
39 hours
40 mins |
7/23/99 |
9/13/99 |
|
| 1 |
Phase I - Planning & Purchasing |
1 hours
20 mins |
7/23/99 |
7/30/99
8/20/99 |
Original end date
was extended due to an error in the order of the project plans and epoxy/foam
kit. This delayed Phase II & III. |
| 1.01 |
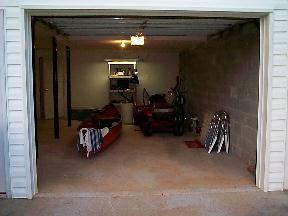
Select Building Location |
10 mins |
7/23/99 |
7/23/99 |

Took measurements from both garages at my house.
I chose the smaller one since it is still big enough to house the project,
which leaves the larger one for parking the car, etc. |
| 1.02 |
Purchase Project Plans |
10 mins |
7/23/99
8/6/99 |
7/23/99
8/9/99 |
Originally attempted to purchase
the designs and epoxy kit from Boat Plans Online on 7/23/99.
There was an error on my order, so I re-ordered the plans on
8/6/99. Cost was $35.
The plans arrived 8/9/99! |
| 1.03 |
Purchase Lumber |
1 hour |
7/24/99 |
7/24/99 |

Purchased the lumber from Home Depot.
Using BC Exterior Pine. Purchased two 1/4" 4'x8' sheets
and three 3/8" 4'x8' sheets. Total cost was about $75. |
| 1.04 |
Purchase Epoxy & Fiberglass Supplies |
2 hours |
8/20/99 |
8/20/99 |
I'll need about 2 gallons of epoxy resin, 1 gallon of
putty filler (wood flour), 50 yds 4" fiberglass tape. I will
look to see if everything can be purchased at the local
Home Depot. |
| 1.05 |
Salvage buoyancy foam |
2 hours |
8/7/99 |
8/7/99 |
I found some large pieces of
buoyancy foam that washed up on the shore of a little island on the
lake. I tied some lines around it and hauled it back to
the dock. I have more than I need and saved a few bucks
in the process! |
| 2 |
Phase II - Construction |
14 hours
20 mins |
7/26/99 |
8/14/99 |
incurred 18 day
delay
(see 1.02) |
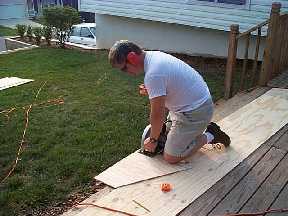
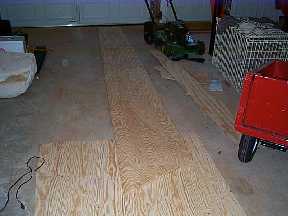
| 2.01 |
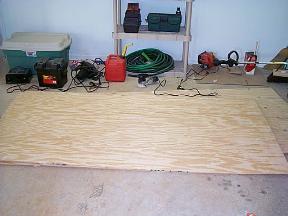
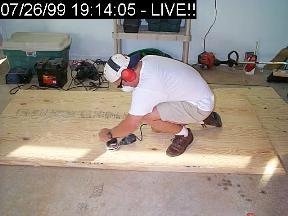
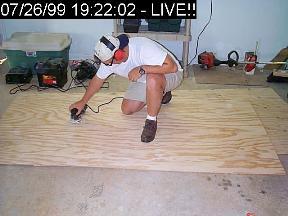
Clean plywood |
3 hours |
7/26/99 |
7/26/99 |
 
Cleaned each sheet of plywood with a light sanding
using a random orbital sander. |
| 2.02 |
Scribe starboard side panels |
2 hours |
8/9/99 |
8/9/99 |
Two hours may seem like a lot, but
my theory is measure twice, cut once. I used the measurements from
the plans rather than the full size patterns. I felt I
had a better chance of accuracy doing this. I also marked
the locations of all the frames, seat locations and the starboard
side butt block. |
| 2.03 |
Cut starboard side panels |
1 hour |
8/10/99 |
8/10/99 |
I checked all lines and measurements before making
the cut. I used a circular saw to cut along the outlines of the starboard
side panels and cut the butt block from scrap. |
| 2.04 |
Assemble starboard side panels |
10 mins |
8/10/99 |
8/10/99 |
I used staples and the 6" butt block
to join both halves of the starboard side panel. |
| 2.05 |
Scribe port side panels |
15 mins |
8/11/99 |
8/11/99 |
I used the starboard side panel
to trace the outline for the port side. I also used the plans
to place the frames, seat locations and the port side butt
block. |
| 2.06 |
Cut port side panels |
15 mins |
8/11/99 |
8/11/99 |
I checked all lines and measurements
before making the cut. I used a circular saw to cut along the outlines
of the port side panels and cut the butt block from scrap. |
| 2.07 |
Assemble port side panels |
10 mins |
8/11/99 |
8/11/99 |
I used staples and the butt block to join both
halves of the port side panel. |
| 2.08 |
Scribe frames and transom |
2 hours |
8/12/99 |
8/12/99 |
I transferred the measurements from
the plans. |
| 2.09 |
Cut frames and transom |
1 hour |
8/12/99 |
8/12/99 |
I checked all lines and measurements
before making the cuts. The frames have straight and curved lines so
I used a circular saw for the straights and a sabre saw for the inside
curves. |
| 2.10 |
Install mid seat stern frame |
10 mins |
8/13/99 |
8/13/99 |
The hull was assembled upside down.
I attached the side panels to the mid seat stern frame with small
nails and supported it with a chunk of that foam I hauled from the
lake. |
| 2.11 |
Tack the bow |
10 mins |
8/13/99 |
8/13/99 |
I drilled a few small holes along
the bow and stitched the side panels together. The string used
in weed eaters worked really well for the stitches. |
| 2.12 |
Install the transom |
10 mins |
8/13/99 |
8/13/99 |
I stitched the two side panels to
the transom and reinforced it with small nails. |
| 2.13 |
Install remaining frames |
1 hour |
8/13/99 |
8/13/99 |
I used stitches and small nails
to attach the two side panels to each remaining frame. |
| 2.14 |
Check for symmetry |
30 mins |
8/13/99 |
8/13/99 |
By measuring the diagonals, I
was able to make sure every thing fit together correctly. Also, a good
look bow to stern and stern to bow confirmed everything was
symmetrical. |
| 2.15 |
Attach bottom panels |
30 mins |
8/13/99 |
8/13/99 |
I attached the bottom panels to the
hull with a couple stitches. |
| 2.16 |
Cut bottom panels |
1 hour |
8/14/99 |
8/14/99 |
I used a sabre saw to cut the
hang over from the bottom panels like cutting the crust of
a pie. |
| 2.17 |
Fasten bottom panels |
1 hour |
8/14/99 |
8/14/99 |

I used stitches about every six inches to fasten
the bottom to the sides. The hull is now completely shaped and
somewhat strong. |
| 3 |
Phase III - Fleshing |
24 hours
30 mins |
8/20/99 |
9/13/99 |
not started |
| 3.01 |
Tape the joints |
10 mins |
8/20/99 |
8/20/99 |
I'll use duct tape to cover the small gaps between the joints
from the outside. This will keep the epoxy fillets in the joints. |
| 3.02 |
Flip the hull! |
10 mins |
8/20/99 |
8/20/99 |
Flipping the hull is always an exciting stage! I'll
put it on blocks and check for symmetry again. |
| 3.03 |
Apply epoxy pre-coat |
1 hour |
8/20/99 |
8/20/99 |
I'll use a thinned epoxy to saturate all surfaces on the
inside of the hull. The epoxy will cure in a few hours. |
| 3.04 |
Build epoxy fillets |
1 hour |
8/21/99 |
8/21/99 |
I'll use a plastic bag with a small corner cut out
to squeeze the epoxy and micro balloons into every joint. Then I'll
use a plastic spoon to shape the fillets. |
| 3.05 |
Fiberglass all interior joints |
4 hours |
8/21/99 |
8/21/99 |
I'll use fiber glass tape wetted with epoxy resin
in all interior joints. They will cure in a few hours. |
| 3.06 |
Flip the hull again |
10 mins |
9/3/99 |
9/3/99 |
I'll flip the hull to begin working on the exterior.
I'll remove the duct tape at this point. |
| 3.07 |
Grind small radius on all edges |
1 hour |
9/3/99 |
9/3/99 |
I'll use a random orbital sander to create a
rounded edge on all corners. This will help the fiberglass apply
more securely. |
| 3.08 |
Apply external epoxy pre-coat |
1 hour |
9/3/99 |
9/3/99 |
I'll use a thinned epoxy to saturate all surfaces on the
outside of the hull. The epoxy will cure in a few hours. |
| 3.09 |
Build epoxy fillets in all corners |
4 hours |
9/4/99 |
9/4/99 |
I'll use a plastic bag with a small corner cut out
to squeeze the epoxy and micro balloons into every joint. Then I'll
use a plastic spoon to shape the fillets. |
| 3.10 |
Fiberglass all exterior joints |
4 hours |
9/4/99 |
9/4/99 |
I'll use fiber glass tape wetted with epoxy
resin on all exterior joints. They will cure in a few
hours. |
| 3.11 |
Sand to smooth |
4 hours |
9/10/99 |
9/10/99 |
I'll use a fine sand paper to smooth out the layer of
epoxy before applying paint. |
| 3.12 |
Paint Interior |
2 hours |
9/10/99 |
9/10/99 |
I haven't decided on the colors yet. |
| 3.13 |
Paint Exterior |
2 hours |
9/11/99 |
9/11/99 |
I haven't decided on the colors yet. |